¶ 📘 Creating a VLAN in pfSense
Written by: Dylan Barrett
Steps Recorded on: July 20, 2025
¶ 🔧 VLAN Creation
- Navigate to Interfaces → VLANs in the pfSense web GUI.
- Click Add.
- Set the following:
- Parent Interface (e.g.,
em0,ix0, etc.) - VLAN Tag
- (Optional) VLAN Priority
- Description for the VLAN
- Parent Interface (e.g.,
- Click Save, then Apply Changes.

¶ 📑 Assign the VLAN to an Interface
- Go to Interfaces → Assignments.
- Use the last dropdown to select the VLAN you just created and click Add.

¶ ⚙️ Configure the New Interface
- Click the interface name (e.g.,
OPT1,VLAN10) to edit it. - Enable the interface.
- Select Static IPv4 or DHCP:
- If static, assign an IP (e.g.,
192.168.10.1/24)
- If static, assign an IP (e.g.,
- Click Save, then Apply Changes.

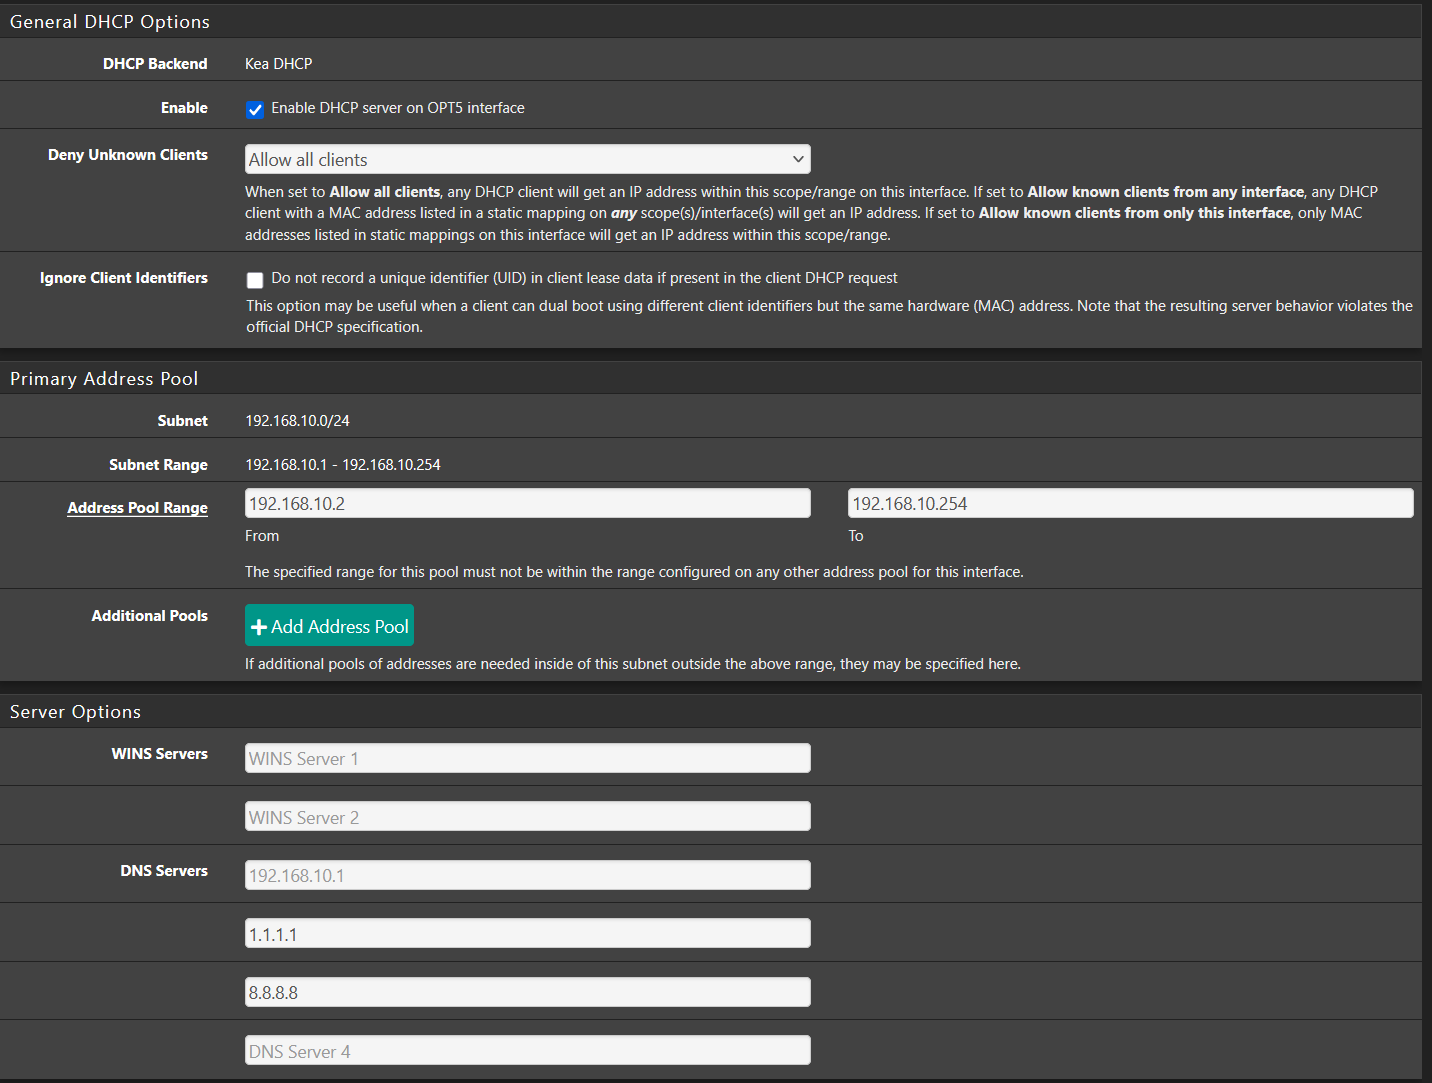
¶ 📡 Enable DHCP for VLAN
- Go to Services → DHCP Server.
- Select the interface you just configured.
- Check Enable DHCP Server on this interface.
- Set the Address Range (e.g.,
192.168.10.100to192.168.10.200). - Click Save, then Apply Changes.
¶ 🔐 Create Basic Firewall Rules
- Navigate to Firewall → Rules, select the VLAN interface tab.
- Add rules to allow the necessary outbound traffic for the devices.
Here are the default rules I typically add to new interfaces:
| Protocol | Source | Port | Destination | Port | Gateway |
|---|---|---|---|---|---|
| IPv4 | Subnet | * | * | 80 | * |
| IPv4 | Subnet | * | * | 443 | * |
| IPv4 | Subnet | * | * | 53 | * |
⚠️ These are basic allow rules for HTTP, HTTPS, and DNS. You should restrict access further for guest or IoT VLANs.
¶ ✅ Next Steps
- Test connectivity from a client device on the VLAN.
- Add additional firewall rules for DNS, NTP, ICMP, or inter-VLAN access as needed.
- Set up VLAN tagging on switches and APs if applicable.